In this guide
At a glance
- Plant
- Ipomoea batatas
- Start with
- Healthy slips
- Position
- Full sun and warm soil
- Harvest
- Before frost
A sweet potato vine can make an empty bed look generously planted in surprisingly little time. The harvest, though, happens out of sight. Those handsome leaves need a long enough warm season, room for the roots below them, and a gentler hand at lifting than an ordinary potato might receive.
Start by choosing an edible sweet potato cultivar suited to your region. Ornamental sweet potato vines belong to the same species, but a plant selected for attractive foliage is not the sensible starting point for a dependable kitchen crop. Sweet potatoes are also different from true yams and ordinary potatoes: their planting material and storage needs deserve their own plan.
Choose for your season before choosing a color
Options include orange-fleshed cultivars such as ‘Beauregard’, ‘Jewel’, ‘Garnet’ and ‘Centennial’, alongside white- and purple-fleshed choices. Those colors are useful in the kitchen, but days to maturity and local performance should come first. A variety that thrives through a long southern summer may disappoint in a shorter, cooler season.
Read the cultivar description carefully, including its growth habit. A compact selection such as ‘Vardaman’ may be easier to accommodate than a vigorous spreading vine, but compact foliage does not remove the need for a useful volume of soil. Give a container crop a substantial, freely draining container rather than squeezing it into a decorative pot.
Plant slips into soil that is genuinely warm
Sweet potatoes are normally started from slips, the young shoots produced by a storage root, rather than from seed or pieces of potato with eyes. Healthy planting material from a reliable source makes the beginning more predictable. Sprouting a grocery-store root can be an experiment; its variety, treatment and plant health may be unknown.
Wait until frost has passed and the soil has warmed to about 65°F (18°C), rather than using a calendar date that belongs to somebody else’s climate. Prepare a sunny bed with loose soil and good drainage. Ridges or raised beds can help where the ground warms slowly or is heavy, provided they do not leave the crop chronically dry.
Follow the spacing supplied for your cultivar. Set the slip’s lower nodes into moist soil with the upper leaves above ground, firm gently and water it in. Keep new plants from drying out while they establish. A wind-tossed slip in a dry pocket of soil has little chance to make the vigorous vine you are imagining.
Keep the early growth steady
Weed while the plants are small, taking care around their developing roots. Once vines cover the bed, reaching every weed becomes much more awkward. Supply water when the root zone needs it, especially during establishment and dry weather, but keep the ground from remaining saturated.
A generous dose of nitrogen is not a shortcut to a generous harvest: it can encourage foliage at the expense of the storage roots. Base soil amendments and feeding on the condition of your soil and local advice. A bed full of rich green leaves is attractive, but it is only part of the story.
Check the undersides of leaves and the condition of the growing tips as you pass. Identify damage before treating it, and ask your local extension service about important regional pests. Keep notes on the cultivar, planting date and weather; they are more useful next season than a promise that every plant produces the same number of roots.
Lift carefully, then give storage some thought
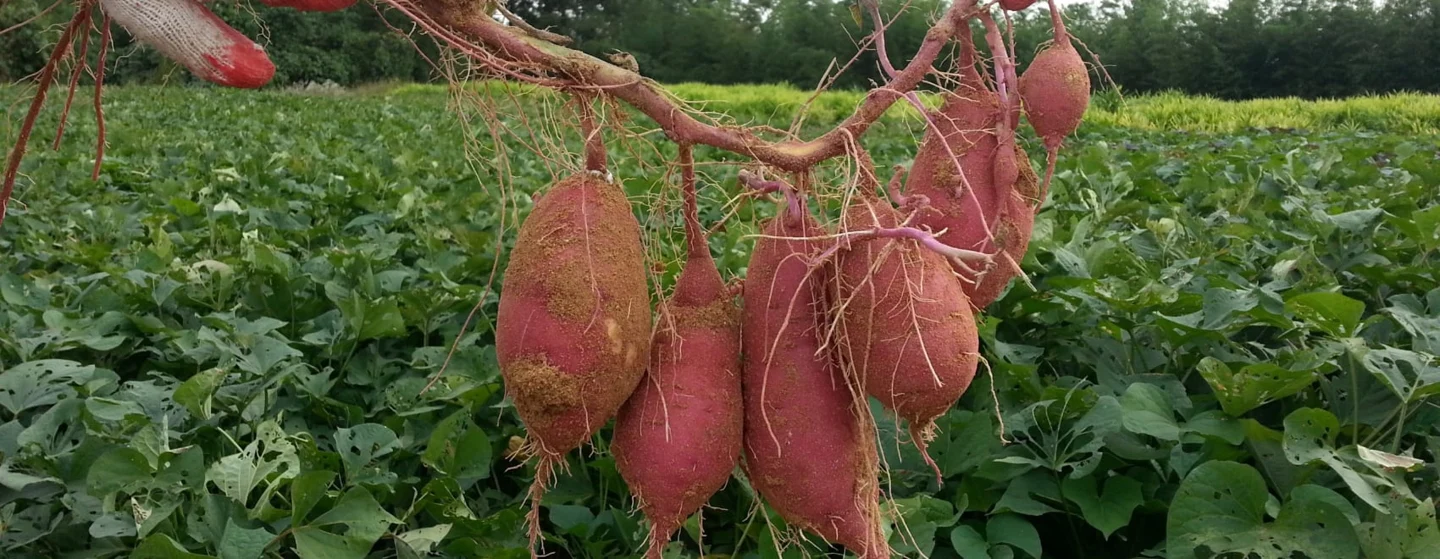
Use the cultivar’s expected season as a guide and check a plant when the crop approaches maturity. Harvest before frost. Cut back enough vine to see what you are doing, loosen the soil beyond the likely root cluster, and work inward carefully. Freshly lifted skins bruise and scrape easily, so resist dropping roots into a bucket or scrubbing them clean.
Separate damaged roots for early use and keep sound ones for storage. Commercial curing uses controlled warmth and humidity; a cool shed is not the same process. Follow a regional extension method that you can actually provide, keeping roots protected from rain and well ventilated. After curing, sweet potatoes need warmer storage than an ordinary refrigerator offers. Check them periodically and remove any developing rot.
That final handling matters. Growing the crop takes a season; rough lifting or unsuitable storage can undo the result in an afternoon.
Separate growing time, curing and storage
A sweet potato plan needs three suitable environments in sequence: warm growing conditions, appropriate curing conditions and a sound storage place. Having space for the vines answers only the first question. Utah State University's sweet potato guide describes harvest handling and warm curing separately from later, cooler storage. Neither stage is the same as putting freshly lifted roots in a cold shed or household refrigerator.
Begin with the cultivar's stated days to maturity and find out what conditions that estimate assumes. For an illustrative cultivar listed at 100 days from planting slips, a site offering roughly 110 suitable growing days leaves only ten days of nominal margin. A cold establishment period could use that margin before the vines grow strongly. The calculation does not predict a harvest; it helps explain why an earlier cultivar or a different protected growing plan may be worth investigating.
Near harvest, check representative roots carefully rather than assuming vigorous foliage proves size below ground. Avoid repeatedly digging through the whole bed. Note whether the crop has had enough warmth and whether frost or wet conditions make delaying the harvest unwise. Keep different varieties labeled if you want to compare them next year.
Set up the post-harvest space before lifting. Sound roots should remain protected from damage and rain, with the warmth, humidity and airflow required by the curing method you follow. Extension recommendations can differ in temperature and duration because their methods and conditions differ; use one complete, achievable protocol rather than combining the warmest temperature from one with the longest duration from another. A room described as “warm” without checking its conditions is not a controlled cure.
Sort roots during handling. A clean tool cut or scrape makes a root a candidate for earlier use, while soft decay or suspicious deterioration needs a separate assessment and appropriate disposal. Curing cannot restore rotten tissue.
Once stored, label the batch with cultivar, lifting and curing dates. Inspect it periodically, noting shriveling, injury or decay. That record can reveal whether the limitation was the growing season, rough handling or the storage environment.
Sources & further reading
This guide draws on horticultural and specialist references. Conditions vary with climate, cultivar, and site.
- University of Maryland Extension: Growing Sweet Potatoes in a Home Garden
- University of Minnesota Extension: Postharvest handling
- Utah State University Extension: Sweet potatoes in the garden