In this guide
At a glance
- Light
- Full sun
- Planting
- Usually autumn; variety and climate matter
- Starting material
- Healthy cloves sold for planting
- Soil
- Moisture retentive and well drained
- Harvest
- Leaves begin yellowing; inspect a bulb
- Storage
- Cure before storing
Garlic asks you to reserve a small piece of ground for a surprisingly long time. A clove planted in autumn may not become a finished bulb until the following summer. The reward is a crop that is easy to use, easy to share and, if cured properly, useful well after the bed has been cleared.
Success begins with planting stock suited to your climate. A bulb from the kitchen might sprout, but garlic supplied for planting gives you a known variety and a better starting point for managing disease and harvest expectations.
Choose hardneck or softneck with the climate in mind
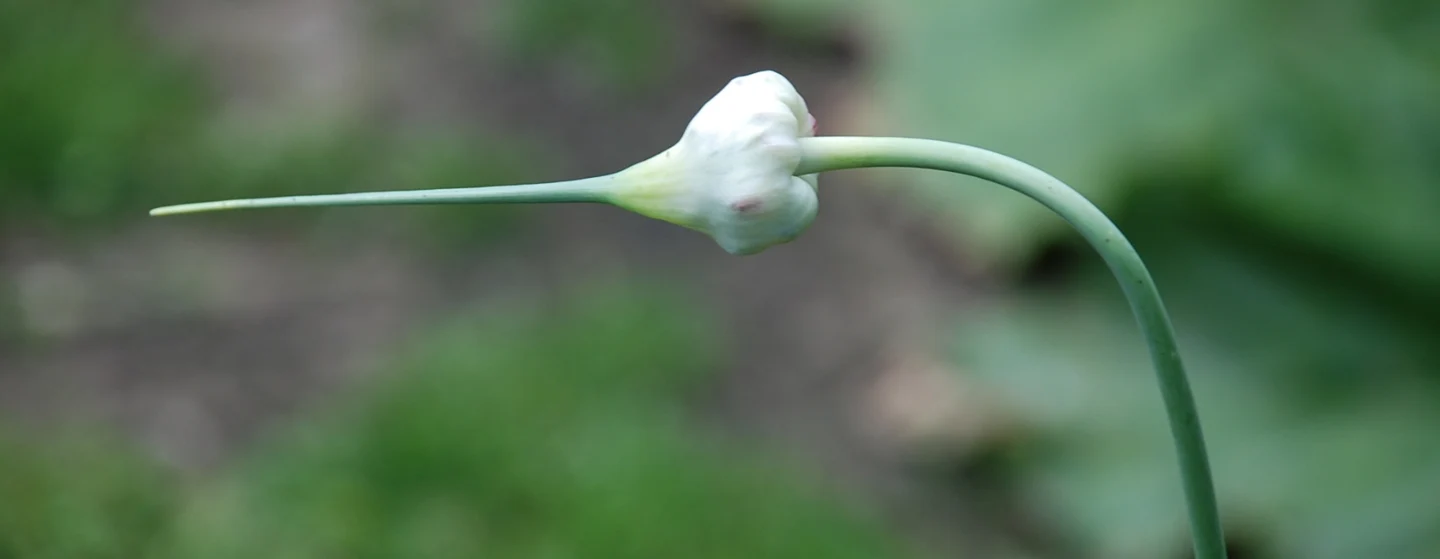
Both hardneck and softneck garlic belong to Allium sativum. Hardneck types usually produce fewer, larger cloves and a central flowering stem, or scape. Softnecks generally have more tightly packed cloves and often store longer. Local suitability matters more than declaring one group universally better.
Cold-climate gardeners commonly choose hardneck varieties adapted to their winters, while suitable softnecks are useful in milder areas. Ask which named varieties perform locally and how long they normally store. Elephant garlic is a different plant, more closely related to leeks; its very large cloves should not be used as the model for ordinary garlic.
Prepare the bed before splitting the bulb
Choose full sun and free-draining, moisture-retentive soil. Remove weeds and improve the structure with well-rotted organic matter where needed. Waterlogged winter ground is a poor place to leave cloves for months, so consider a raised bed or another site if drainage is unreliable.
Autumn planting suits many varieties because a period of cold supports normal bulb development. Some varieties can be planted in late winter or spring. Follow the variety’s guidance and local conditions rather than importing one region’s exact frost-based date.
Rotate garlic with other crops rather than repeatedly putting it into the same allium bed. Healthy planting material, drainage and careful observation are more useful than a long list of supposed medicinal benefits.
Plant individual cloves the right way up
Separate the bulb shortly before planting, leaving the papery covering on sound cloves. Use the larger healthy cloves for a more promising start. Place the flat basal end down and the pointed end up. About 15cm (6in) between cloves is a common spacing; follow local guidance for depth, particularly in heavy soil or severe winters.
Mark the rows so you do not mistake emerging shoots for weeds. Where winter mulch is appropriate, use a loose material and keep an eye on drainage. Mulch can protect the soil and suppress weeds, but it should not conceal a bed that stays saturated.
Garlic is usually propagated from cloves. Bulbils on a flowering stem are not true seeds and generally take longer than cloves to produce a useful divided bulb. They are an interesting propagation project, not the quick route to next summer’s kitchen crop.
Keep weeds down and respond to growth
Remove weeds while they are small, taking care around the developing bulbs. Water during dry periods while the plants are actively growing; containers and sandy beds will need checking more often. Avoid turning moist soil into a permanently wet bed.
Feed according to the soil’s needs, with attention to early growth rather than repeated late nitrogen applications. Where a hardneck develops a scape, removing it while young directs the plant’s effort toward the bulb and provides a useful extra kitchen harvest. Stop routine watering as bulbs mature and the foliage begins to yellow.
Lift a test bulb, then give the harvest time to dry
Watch the leaves as the crop approaches its expected harvest period. Lower leaves turning brown while some upper foliage remains green is a useful cue to inspect a bulb. Lift it gently and check whether the cloves have filled out. Waiting until every leaf is dead can leave split wrappers and a crop that stores poorly.
Use a fork to loosen the soil rather than pulling hard on the stem. Keep the foliage attached for curing and place the plants in a dry, airy spot protected from rain and excessive heat. Once the wrappers and stems are thoroughly dry, trim and store sound bulbs somewhere cool, dry and ventilated. Set damaged bulbs aside for prompt use and save only healthy stock for replanting.
Sample the bulbs before lifting the whole bed
Garlic harvest is a judgment about the bulb, not a date printed beside a variety name. Leaves provide a cue to begin checking, but drought, disease and different positions in the bed can change their appearance. Pulling every plant because one patch has browned risks turning a local problem into an early harvest.
Choose a few representative plants from different parts of the bed and loosen the soil carefully before lifting. Examine bulb size, clove definition and the condition of the outer wrappers. University of Massachusetts Extension's harvest guidance describes checking a sample bulb across its cross-section to see whether cloves fill their wrappers. That sample is sacrificed to the decision; keep it for prompt kitchen use rather than storage. Waiting until wrappers split can reduce keeping quality.
Imagine that the sunny bed edge has dry leaves but the center remains greener. Sample both areas. If edge bulbs are ready and central bulbs still need time, a staged harvest may be more useful than treating the bed as one unit. Record which area was lifted and the condition of its wrappers. This is an illustrative decision process, not a reason to delay bulbs already deteriorating in wet soil.
Keep sound, intact bulbs separate from those cut by a fork, split, unusually soft or showing decay. Curing removes moisture from otherwise suitable bulbs; it does not repair damaged cloves or reverse rot. Do not wash soil into the neck, bang bulbs together or leave them cooking in strong sunshine.
During curing, check the neck and outer layers as well as the calendar. Provide sheltered airflow and enough spacing to avoid a damp bundle. A dry outside with a moist, thick neck is not the same as a fully cured bulb. Trim and store according to your chosen method only once the crop has dried appropriately.
Label the stored batch with variety and harvest date, and inspect it periodically. Use sound but damaged bulbs first. This sorting makes the storage crop more reliable without pretending that every lifted bulb deserves months on the shelf.
Sources & further reading
This guide draws on horticultural and specialist references. Conditions vary with climate, cultivar, and site.
- RHS: garlic growing guide
- University of Minnesota Extension: garlic
- University of Massachusetts Extension: Garlic harvest, curing and storage