In this guide
At a glance
- Planting outdoors
- Autumn, before spring growth
- Position
- Sun; well-drained soil
- Indoor flowers
- Use bulbs prepared for forcing
- After flowering
- Keep healthy leaves until they yellow
- Container care
- Drain excess water
- Handling
- Wear gloves when handling bulbs
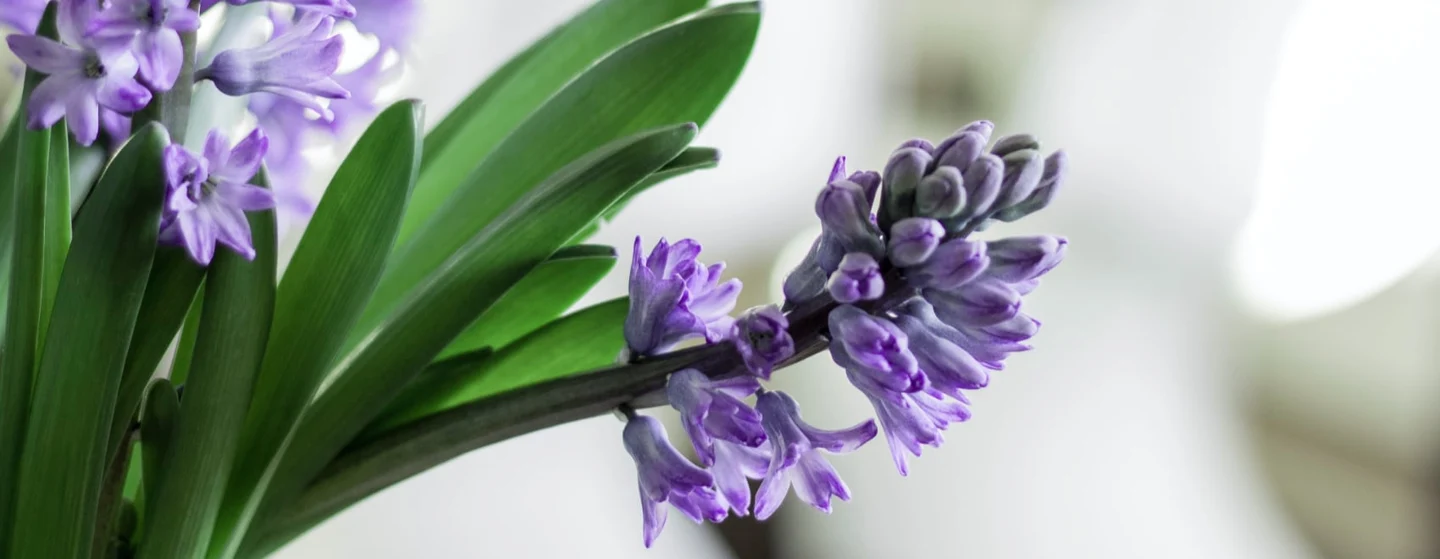
Hyacinths do a surprising amount of work in a small space. A few bulbs beside a path bring dense color and fragrance at the moment the garden is beginning to wake up. A pot on a table brings that same intensity close enough that one plant may be quite sufficient.
The decision to make first is where you want the flowers. A spring garden display and a bulb timed to bloom indoors follow different schedules. Starting with the right bulb makes the rest of the job much clearer.
Choose for the display you want
Garden hyacinths are cultivated forms of Hyacinthus orientalis, available in blues, purples, pinks, whites and other shades. Choose firm, sound bulbs and reject soft or visibly damaged ones. Color can guide the composition; the planting position still needs to suit the plant.
For flowers indoors before the normal spring season, look for bulbs specifically prepared or pre-cooled for forcing. Those labels describe treatments and timing, so follow the instructions supplied with that batch. An ordinary bulb placed beside a warm window will not necessarily produce the display you had in mind.
Give garden bulbs a proper root run
Plant outdoors in autumn in well-drained soil. A sunny position is particularly useful if you hope to keep bulbs for future years. The RHS recommends roughly 10cm of planting depth and at least 7.5cm between bulbs for its garden planting method; check local guidance and the bulb supplier's directions for your conditions.
Set bulbs upright, firm the soil gently and water to settle them. Grouping several together gives the flowers more presence than placing single bulbs at long intervals. Leave room for later foliage or neighboring perennials to soften the patch after the hyacinths finish.
Use the pot as part of the plan
For an outdoor display, choose a container with drainage holes and a suitable free-draining potting mix. A decorative outer pot can be useful indoors, but remove the inner pot for watering and let excess water drain before returning it. The hidden pool beneath the bulb is the part that causes trouble.
Container roots have less protection from cold than bulbs planted in the ground. In a severe winter, move the pot to a sheltered position or protect the container appropriately. Shelter should reduce exposure and excess wet without turning a dormant outdoor pot into a warm indoor growing project.
Bring flowers indoors gradually
Follow the cooling and rooting period specified for your bulbs, then increase light and warmth gradually as growth develops. Keep the potting mix appropriately moist without leaving the bulbs wet. Once flowers are developing, a bright, relatively cool room generally makes a more comfortable display than a hot position over a radiator.
A hyacinth glass offers another option: the bulb rests above water while its roots reach down. Keep the water below the bulb's base rather than soaking the bulb itself. This is a temporary flowering display, not a permanent way to grow the plant.
Let the leaves finish their job
Remove faded flower stalks, then keep healthy leaves while they remain green. Water and feed container-grown plants appropriately during this stage; reduce watering as foliage yellows naturally. Cutting the leaves off with the flowers takes away the bulb's opportunity to rebuild reserves.
Outdoor hyacinths may flower again, although later spikes are often looser and less imposing. Forced bulbs are less dependable: university guidance notes that repeat forcing is commonly unsuccessful. If you try them outdoors, treat the next display as a possibility rather than a guarantee, and keep track of where you planted them.
Solve the likely problem, not the whole plant
Soft bulbs and collapsing growth call for a moisture and drainage check. A heavy flower spike may need discreet support, but position a cane carefully without piercing the bulb. Turn an indoor pot occasionally if its stems lean toward the light.
Wear gloves when handling bulbs, as they can irritate skin, and keep them out of reach of children or pets likely to investigate. Fragrance is another practical consideration. Place a flowering pot where you enjoy it without having to spend the evening beside a scent that feels overpowering.
Check preparation and roots before bringing a forcing pot into warmth
A shoot appearing above the compost does not prove that a hyacinth has finished its cold period. Root development and the bulb's preparation matter too. Treat the move into warmth as a decision based on the batch instructions and the plant, not an automatic response to the first green tip.
For ordinary spring bulbs being prepared for forcing, University of New Hampshire Extension describes roughly 14–15 weeks of cooling before moving them to flowering conditions. Commercially prepared or pre-cooled hyacinths may follow a different remaining schedule. Keep the packaging and establish what treatment has already happened; “prepared” and “just bought” do not mean the same thing.
| Before changing the conditions | What to do |
|---|---|
| You do not know whether the bulbs were pre-cooled | Recover the supplier's instructions before assuming the whole cold period is still required |
| Shoots appear before the specified cooling is complete | Keep following the schedule and protect the shoots from damage |
| Cooling is complete and roots are visible through drainage holes | Begin the staged move toward light and warmth described for that batch |
| The bulb is soft or growth is collapsing in wet compost | Investigate decay; warmth and more water will not complete a healthy forcing cycle |
Iowa State's forcing guidance uses visible roots and developing shoots alongside completion of chilling. Look through drainage holes rather than pulling bulbs up to check them. Keep a note of when cooling began, the actual storage temperature and the date you moved the pot. A room described as a “cool spare room” may still be too warm to perform the intended cold treatment.
Work backward from an intended display. As an illustrative calculation, a batch requiring 14 weeks of cooling plus an estimated three weeks to flower occupies 17 weeks, not three. That arithmetic is a planning example, not a promise of a bloom date; cultivar, preparation and growing conditions affect the result. For succession, move separate ready pots into growing conditions at intervals rather than trying to make every pot flower together.
Once flowers fade, keep any healthy foliage if you intend to attempt outdoor recovery. That is a separate project from repeat forcing, which is generally unreliable. Mark saved bulbs so their resting position is not mistaken for an empty planting space.
Sources & further reading
This guide draws on horticultural and specialist references. Conditions vary with climate, cultivar, and site.
- RHS: growing hyacinths
- NC State Extension: garden hyacinth
- Iowa State Extension: forcing spring bulbs
- University of Minnesota Extension: planting and caring for bulbs
- University of New Hampshire Extension: forcing unplanted spring bulbs