In this guide
At a glance
- Insect
- Darkling-beetle larvae, commonly Tenebrio molitor
- Life cycle
- Egg, larva, pupa and beetle
- Chicken feeding
- Extras never replace a balanced ration
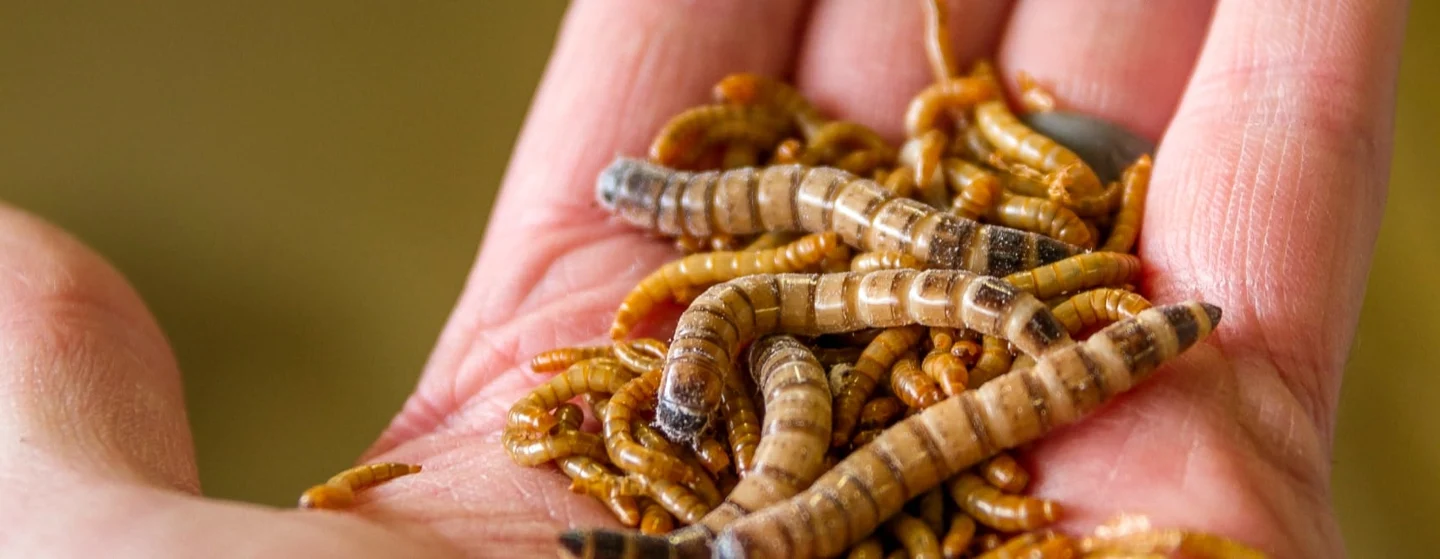
Mealworms can be an interesting small-scale rearing project, but they are not a complete chicken feed or a guaranteed route to better eggs. The useful starting point is the insect itself: the familiar worm is the larva of a darkling beetle, commonly Tenebrio molitor. A productive colony needs the whole life cycle to continue, including the beetles that no longer look like the larvae you intended to harvest.
Before using home-reared insects as poultry feed, check the rules and biosecurity advice that apply where you live. Permitted insects, substrates and processing can be regulated differently for food-producing animals. Raising insects for observation and producing an authorised feed are not automatically the same activity.
For England, Scotland and Wales, current GOV.UK guidance says dried terrestrial insects and processed insect protein cannot be used in farm-animal feed or treats, including hen treats. Do not assume drying a home culture makes it lawful feed. Rules for live insects, processed products and approved production can differ; confirm the intended use with APHA or the relevant local feed regulator before starting.
Understand the four stages
Mealworms develop through egg, larva, pupa and adult. The larvae feed and grow through successive moults before becoming pupae, then beetles. Adults reproduce and lay the eggs that replenish the colony. If you harvest every larva, there is no next generation.
Development depends on conditions including temperature, food, moisture and crowding. The University of Nebraska's educational rearing material demonstrates that temperature affects the rate of metamorphosis. Do not expect a single promised number of weeks to apply to every household container, or treat an arbitrary high temperature as a shortcut to success.
Set up a contained, ventilated space
Use a clean, escape-resistant container with suitable ventilation and a secure cover. Keep it away from stored household food and protect it from other pests. A smooth-sided box is convenient for observation and cleaning, but it still needs to be checked rather than assumed to contain every life stage indefinitely.
Choose a stable location without direct hot sun, damp conditions or extreme temperature swings. A spot where you can inspect the culture comfortably is better than an inconvenient shelf that stays forgotten. Label the container and use dedicated utensils so the project remains separate from food preparation and poultry equipment.
Provide a clean feeding substrate
Bran is a commonly used rearing medium and food. Begin with a manageable depth and amount rather than packing the box with material you cannot inspect. Keep the substrate dry enough to remain in good condition and replace it when it becomes soiled or depleted.
Small pieces of suitable fresh produce, such as carrot or apple, can provide moisture. Use modest amounts and remove leftovers before they spoil. Do not place an open water dish among the insects or keep wet material buried in the bedding. Mould, a sour smell or damp clumps are signs to correct the setup, not something to cover with another handful of bran.
Keep the colony moving through its cycle
Watch for pale pupae and emerging beetles as well as feeding larvae. A simple separation of vulnerable pupae, beetles and larval cohorts can make observation and management easier and reduce losses. Keep records of when groups were moved rather than trying to identify the whole colony's age from larval size alone.
Retain sufficient breeding stock and avoid harvesting faster than the culture replaces itself. Sift gently where necessary, minimising dust and disturbance. Wash hands after handling the culture, and do not use the same tools for the insects and the kitchen. Stop and reassess if you find unexplained deaths, contamination or another pest population.
Keep chicken nutrition in proportion
Chickens need an appropriate balanced ration for their stage of life, together with clean water and the other provisions in their feeding plan. Mealworms, where lawful and suitable to feed, are an extra rather than a replacement. Being rich in one nutrient does not make an ingredient nutritionally complete.
Claims about improved moulting or more nutritious eggs need evidence and nutritional context. A treat cannot diagnose or fix a nutritional problem, and excessive extras can dilute the balance of the main ration. Discuss poor condition, abnormal feather loss, reduced laying or other health concerns with an appropriate poultry professional rather than increasing insects by guesswork.
Harvest and handle with a clear purpose
Keep feed use separate from claims that the insects are safe for people to eat. A home culture does not become a human-food production system simply because mealworms are eaten somewhere else. Substrate, hygiene, processing and applicable regulation all matter.
Choose a scale you can maintain cleanly, with a plan for the adult beetles and the residual substrate. Do not release the culture into the garden or dump it where it can enter stored foods. The value of a small project is that you can observe and manage it properly. If feeding is the goal, lawful sourcing and a balanced poultry diet come before the novelty of producing your own treats.
Keep a small culture traceable
Treat each container as a labelled batch rather than continually tipping everything into one tray. Record when it was started, where the insects came from, the dry substrate and anything added for moisture. A culture that appears active does not tell you what its inputs contained or establish that its insects are suitable for a particular animal.
This distinction matters in research as well as at home. A Food Standards Agency study tested contaminants in black soldier fly larvae reared on selected waste streams. It was a controlled investigation of materials then not permitted for that purpose, not permission to feed kitchen waste to a home mealworm culture. It also involved a different insect from Tenebrio molitor. Do not convert “insects can grow on this” into “this is safe and legal animal feed”.
For a small observational culture, a simple batch card makes problems easier to understand:
| Entry | Useful detail |
|---|---|
| Starting stock | Supplier, date and species identification. |
| Container | A label that stays with the culture when trays are moved. |
| Inputs | Name, source and date added; avoid an unidentified mixture of scraps. |
| Condition | Dry substrate, damp patches, smell, visible mould or unusual deaths. |
| Stages present | Larvae, pupae and adults actually seen, without assuming every larva is the same age. |
| Removal or destination | What was removed and why; feeding remains subject to the receiving animal's needs and local rules. |
If one container develops a problem, keep its equipment and material separate while seeking appropriate advice. Combining it with a healthy-looking batch destroys the comparison and spreads any contaminated material. Do not try to rescue mouldy feed by mixing it into fresh substrate.
Keep the project small enough that you can inspect it properly and prevent escape. A useful first goal is observing the life cycle and maintaining a clean record, rather than maximising output. Before producing insects for animal feeding, verify current rules for your country, animal species, substrates and processing method. Neither a research paper nor an online culture recipe supplies that legal clearance.
Sources & further reading
This guide draws on horticultural and specialist references. Conditions vary with climate, cultivar, and site.
- University of Nebraska: mealworm development
- University of Minnesota Extension: raising chickens for eggs
- University of Minnesota Extension: chicken feeding in cold weather
- GOV.UK / Defra / APHA: animal by-products in farm-animal feed
- Food Standards Agency: primary research on insect rearing substrates